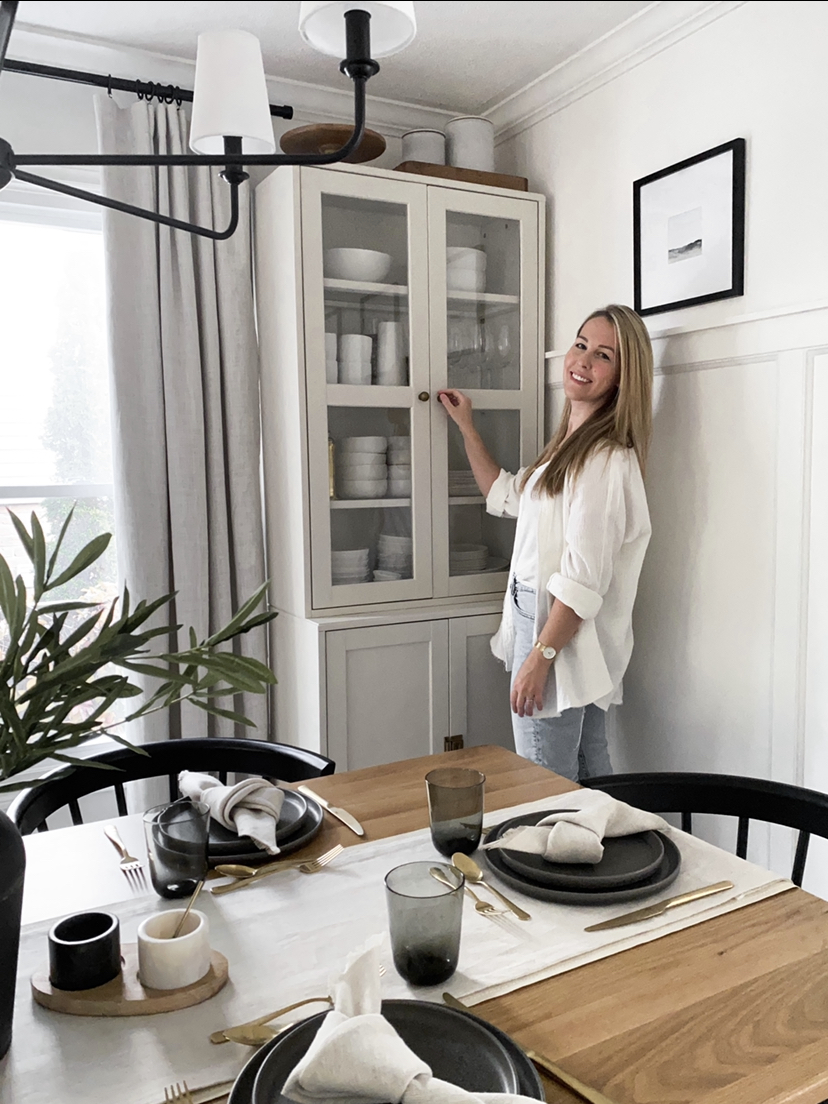
Recently I went about re-painting our IKEA HAVSTA cabinet and I am in LOVE with the results! I want to share all my tips and tricks with you, so that you can hack your own IKEA pieces and avoid making the same mistakes I did! Keep reading for all the products I used and the steps on how to do it!
I am a huge fan of IKEA hacks and have utilized various IKEA pieces in spaces of our home. The reason why these hacks are so popular is because they are affordable, accessible and can be completely customized to fit your space. The downside to Ikea furniture is that often it’s made with less expensive materials and often those materials can be tricky to paint.
Through trial and error, I’ve found a great strategy for painting basic IKEA furniture, including those pieces made out of particleboard or laminate. I’ve painted at least 6 pieces of IKEA furniture for our home, along with IKEA mirrors, IKEA kids furniture/toys and various other pieces
So if you’ve been thinking about trying an IKEA hack, follow these steps to get the best results…that will LAST!
Here’s what you need to start:
MATERIALS:
- Primer (very important to choose the correct primer, I’ll talk more about that later)
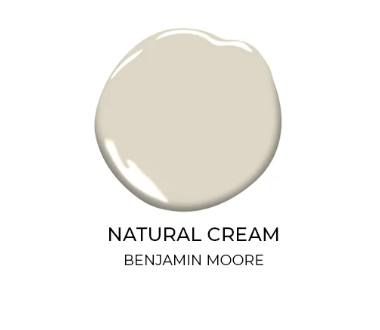
- Paint (I used Benjamin Moore latex paint in the colour Natural Cream)
- Sealer (I used a spray, but I’d recommend using a roll on)
- Paint Roller (I prefer the fuzzy roller covers)
- Paint brush
- Paint tray
- Sanding block &/or sand paper
- Tack or Microfibre cloth x2
- Canvas drop cloth
- Painters Tape (I prefer Frog Tape brand)
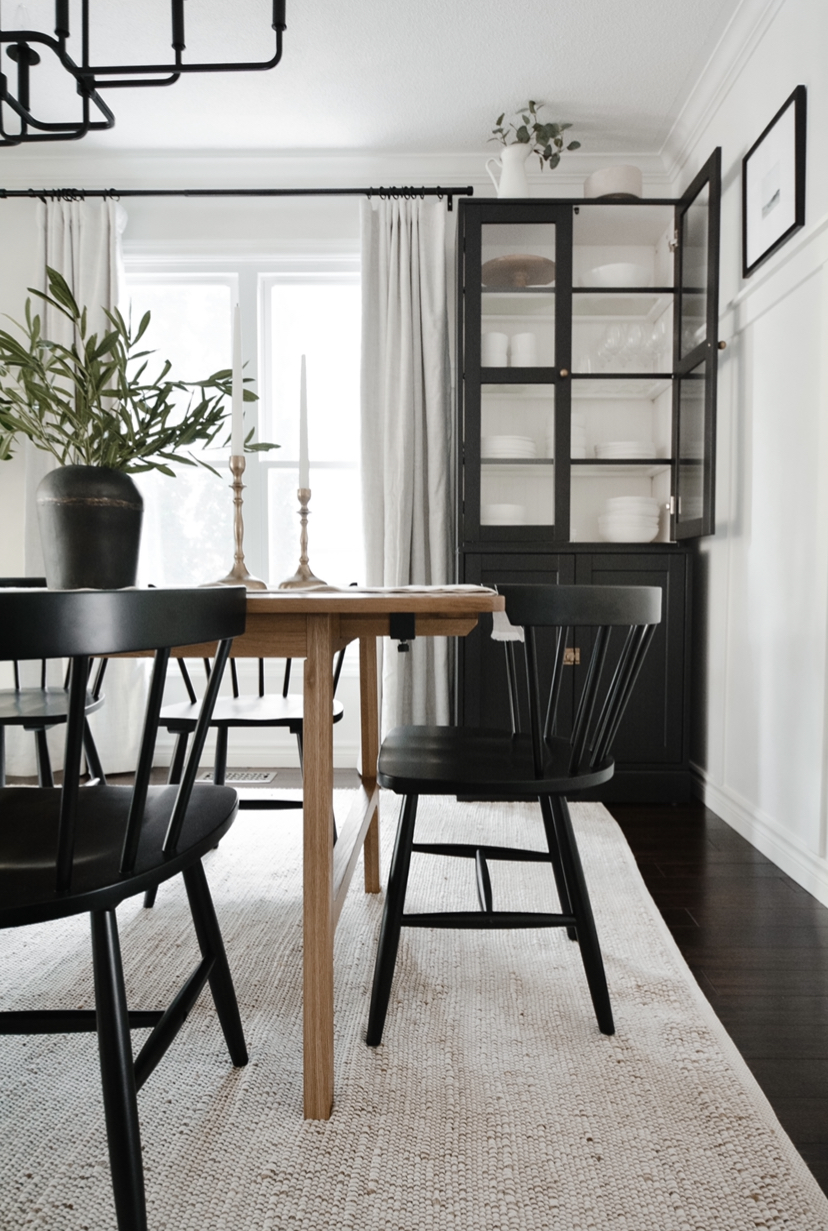
This is how our cabinet looked after the first round of painting. It looks great in photos, but the truth is that I didn’t follow all the right preparation steps and it was peeling. I initially went with black (as I really wasn’t sure what colour I wanted) and although I liked it black, it was feeling too dark for the space. I knew it needed to be repainted after it had started peeling so this was my opportunity to do it right!
GETTING STARTED:
If your IKEA piece is assembled, I’d recommend taking off any doors or drawers in order to make the process go a little faster. In that case, take off all hardware and hinges, set up your area to sand. If your pieces is unassembled even better!
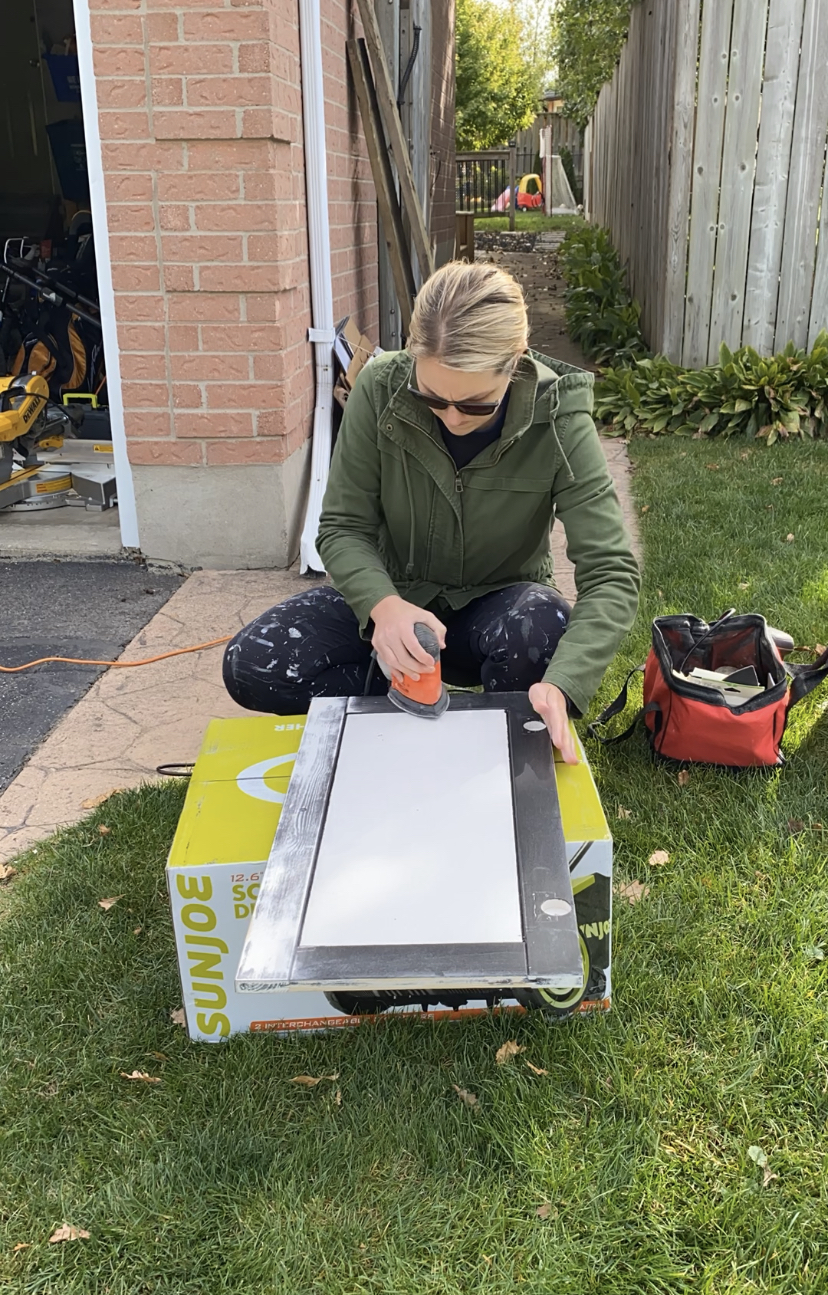
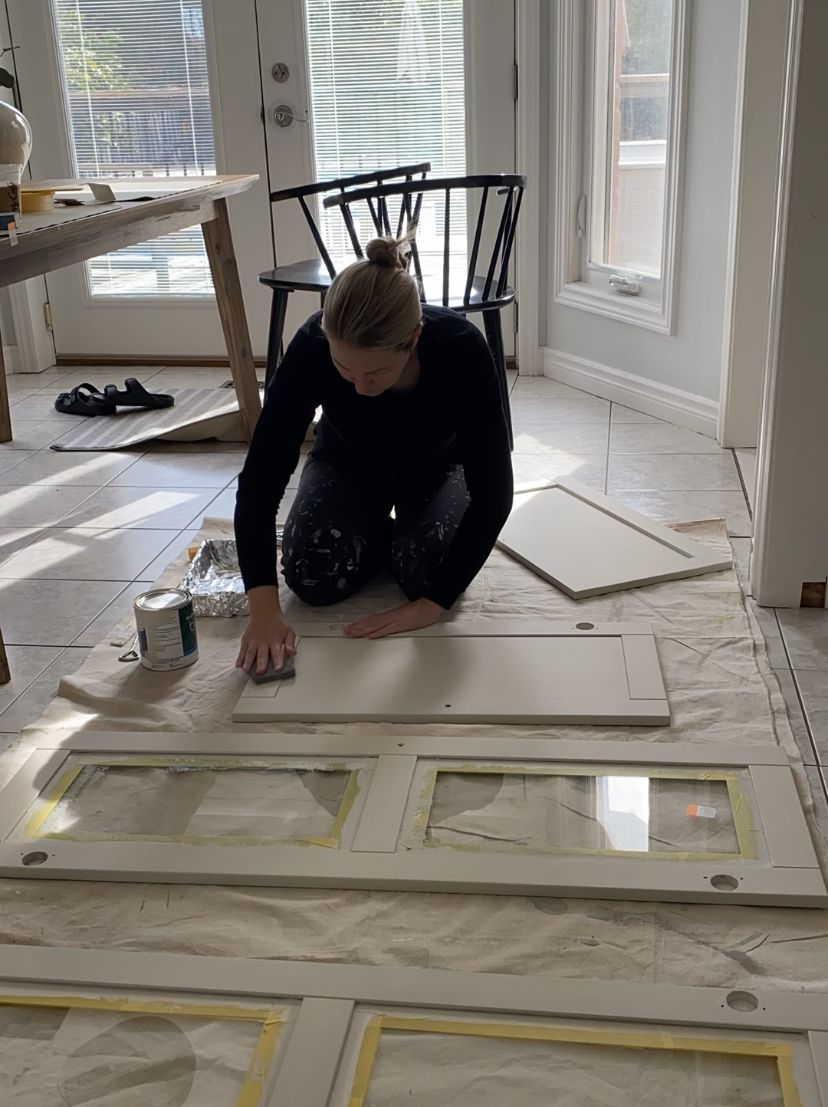
STEP 1: SAND
I cannot stress how important this step is. For our dining room IKEA HAVSTA cabinet, I made the mistake of lighting sanding some areas and not others. I assumed that because that piece is solid wood that the primer/paint would stick, but unfortunately that wasn’t the case! You need to sand EVERYTHING you are planning to paint.
I’d highly recommend sanding with a fine grit sanding block in harder to reach areas, and using a palm sander with a fine grit paper 102-180 for larger areas. Often times a sanding block will be enough, but I like to sand down just a little more, just to be sure. I used my Ryobi orbital sander on the larger areas and it made the job go quickly and did a great job prepping for paint.
After sanding down, vacuum up any large areas of dust and then use a microfibre or tack cloth to remove any remaining debris. *(NOTE: I often take an extra step by wetting down a second cloth and going everything again. Once it dries I run the dry cloth over it again). You want to make sure any dust at all, is gone!
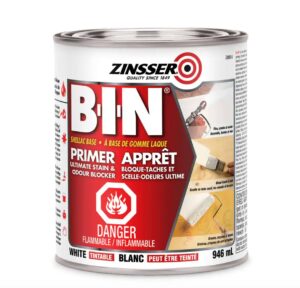
STEP 2: PRIME
It is VERY important that you use the right primer. With our dining room cabinet I used a very basic primer that didn’t seem to adhere well to the IKEA piece. I would highly recommend using Zinsser Shellac Based primer. The texture of this paint is different as its made up of different materials, but is super easy to use and does a fantastic job covering up stains, odours and wood knots (which you often see in IKEA pieces). If you don’t use the proper primer, with time those knots can start to bleed through your paint finish, so you want to make sure you are sealing them properly! I would suggest doing at least 1 coat of primer, 2 if you’re painting over a dark piece with a light colour. There are other brands that make great primers too, such as KILZ.
STEP 3: SAND…AGAIN
I truly feel that sanding between coats of paint, is one of the most underrated techniques, yet one of the most effective tips to getting that smooth finish! After you’ve finished priming, make sure you go over your piece with a fine grit sanding block. This is just a very light sand (you don’t need to press hard and 180 grit is perfect to use). You’ll notice the difference immediately in how the finish feels and its great preparation for your next round of painting.
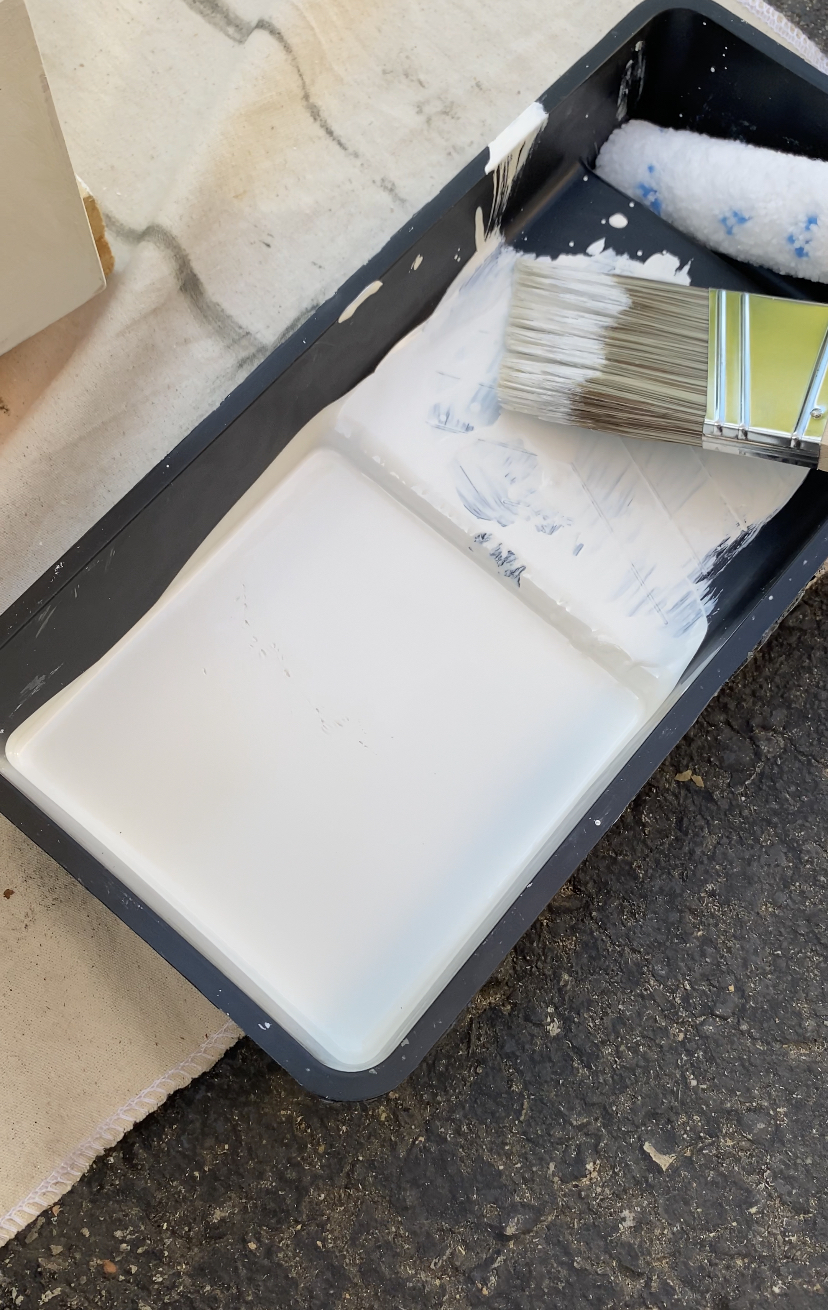
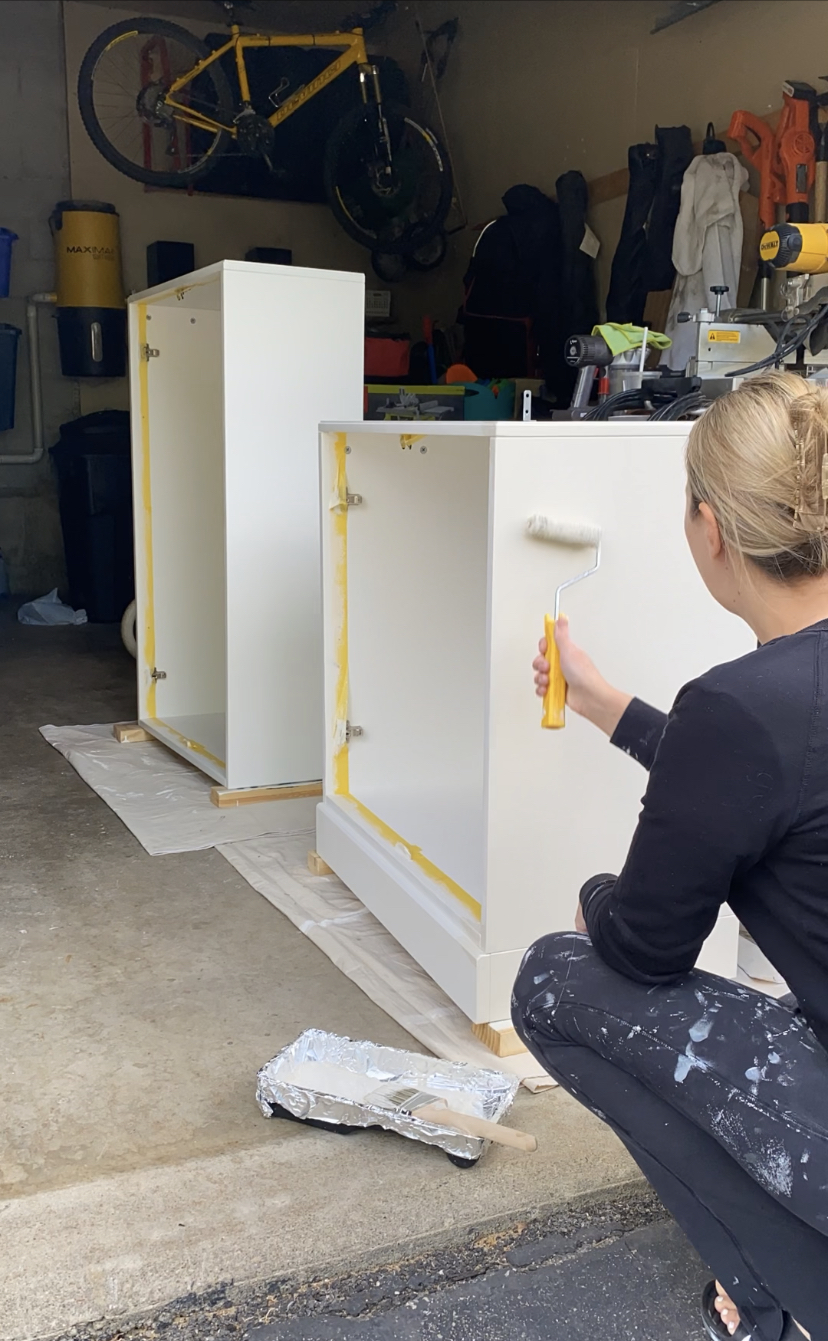
STEP 4: PAINT
You’re going to get the smoothest finish using a paint sprayer, but many of us don’t own a sprayer (or want to set up for that option), so using a roller works just fine. Personally I prefer using fuzzy rollers (I find they give the best finish), but that is personal preference. If you aren’t sure, I’d recommend buying a few of each kind and trying them on a scrap piece of wood so you can see which finish you prefer.
If you decide on using a fuzzy roller, before you start, wrap your roller in painters tape to remove any loose fuzzies that could get into your paint. For easy clean-up line your paint tray with foil. It makes clean-up a breeze. If you plan to break up your painting into multiple days, wrap your roller or paint brush in foil or plastic wrap when you’re done and place it in the fridge. It will keep the paint from hardening and last 24-48 hours so you can come back to your project later!
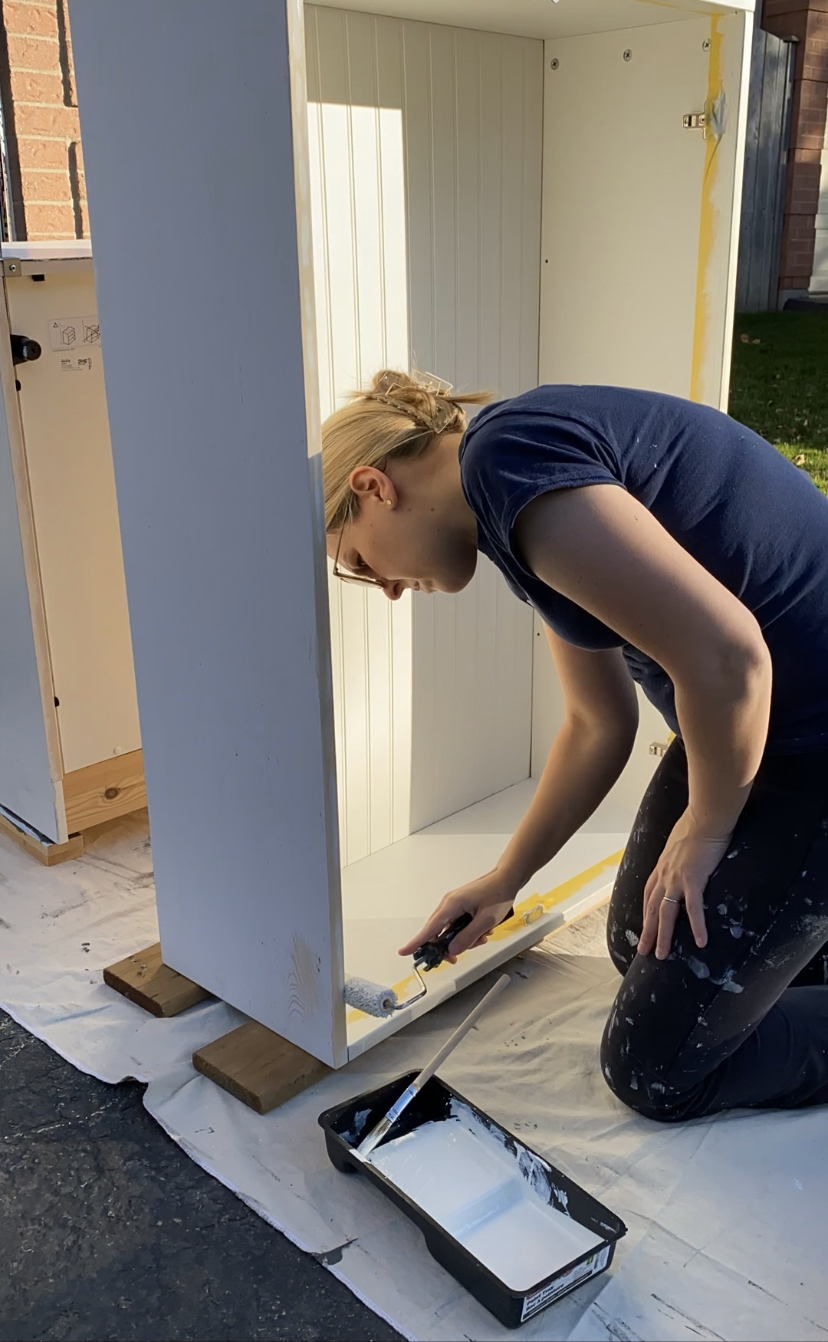
For my most recently IKEA Hack I used Benjamin Moore ‘BEN’ latex paint in the colour, “Natural Cream” in an Eggshell finish.
Start with your first coat by edging all around your piece. Once you’ve finished edging you can start rolling. Don’t go too thick with the paint in order to avoid drips or clumps. Let your first coat dry completely (painting outside in the sun definitely helps it go faster), and then SAND before you roll a second coat. Very rarely do I ever get away with 1 coat. I often feel you need minimum 2 coats (often 3) for a solid finish.
STEP 5: SAND
Once you’ve finished all your painting, let it dry and then do a very light sand (220 grit) all over. Wipe it down with a tack cloth and then you’re ready for sealing!
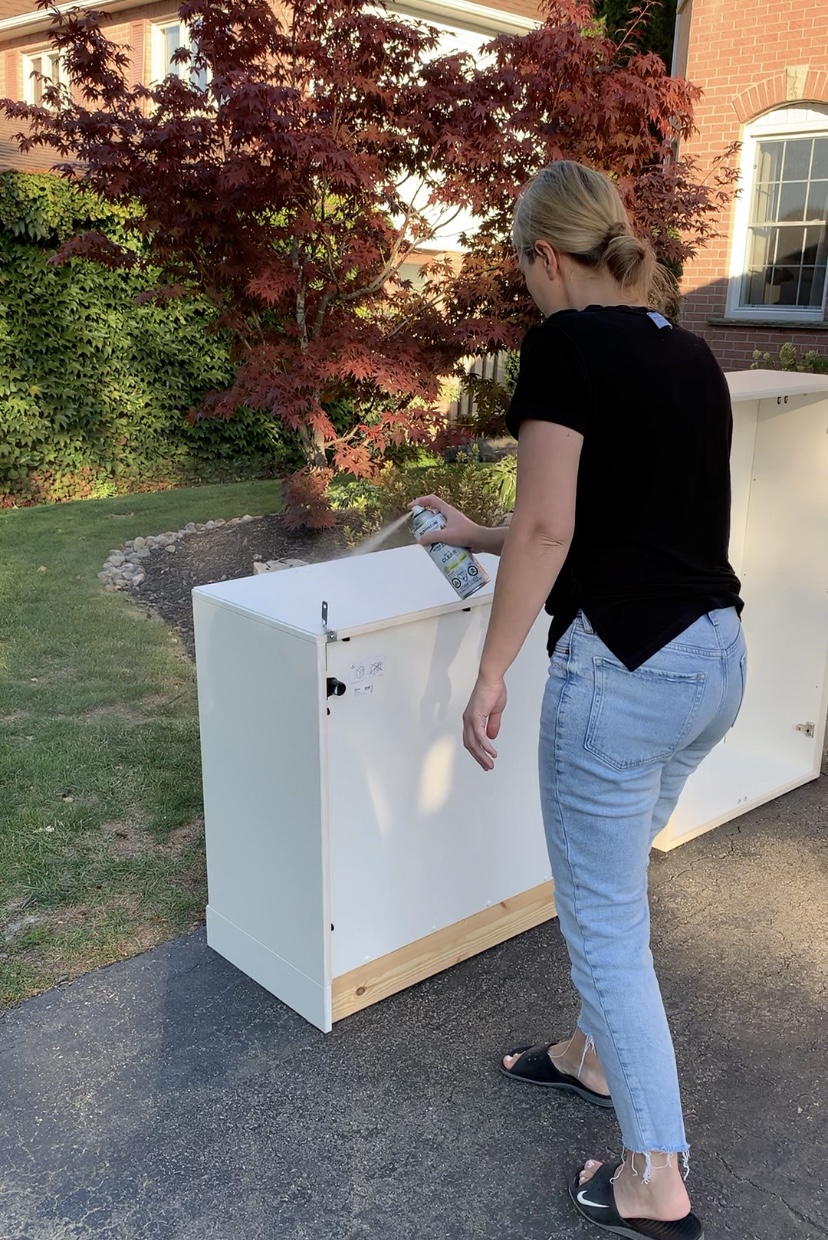
STEP 6: SEAL
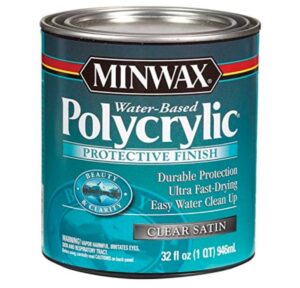
In the case where your piece is in a high traffic area, or going to be used frequently, I’d highly recommend sealing. This is the product that I love for sealing furniture: Minwax Water-Based Polycrylic. It doesn’t modify the colour, goes on clear and dries gloss or matte, depending on which you use. I would recommend testing a spot in an area that wont be seen first, before applying.
And the final results:

This piece has been holding up great, no chipping or peeling and I LOVE how it turned out! I hope this was helpful for those of you thinking about tackling an IKEA Hack!
This post contains affiliate links. If you click a link and make a purchase, I may receive a small commission at no additional cost to you. This helps support my blog and allows me to continue creating the projects you love to see!